Set up homekit video with a USB camera and homebridge on Raspberry PI
This post is mostly for documenting my process, but I hope it helps anyone that comes across it.
Turning a Raspberry Pi Zero 2 W into an RTSP camera source using a USB camera, and then integrating it with Apple Homekit via Homebridge running on a separate Raspberry Pi 5.
Overview
- Pi Zero 2 W: Will run
v4l2rtspserverto serve the USB camera feed over RTSP. - Pi 5: Will run Homebridge with the
homebridge-camera-ffmpegplugin to bring the RTSP stream into HomeKit.
Hardware Used:
- Raspberry PI 5 Basic Kit (8GB Ram)
- Raspberry PI Zero 2 W Basic Kit
- USB Security Camera
- 64 GB High endurance SD Card
On the Zero (RTSP Source)
Prerequisites
- A Raspberry Pi Zero 2 W running the latest Raspberry Pi OS.
- A USB camera compatible with
v4l2.
Install the RTSP Server
sudo apt-get update
sudo apt-get install -y git cmake build-essential liblivemedia-dev liblog4cpp5-dev
git clone https://github.com/mpromonet/v4l2rtspserver.git
cd v4l2rtspserver
cmake .
make
sudo make install
This installs the RTSP server binary (v4l2rtspserver) into /usr/local/bin
Set up the RTSP Server as a Daemon
Create a systemd service file so the RTSP server runs on boot:
sudo vim /etc/systemd/system/usb-camera-rtsp.service
[Unit]
Description=USB Camera RTSP Stream
After=network.target

[Service]
ExecStart=/usr/local/bin/v4l2rtspserver -W 640 -H 480 -F 30 /dev/video0
Restart=always
User=pi

[Install]
WantedBy=multi-user.target
Then enable and start the service:
sudo systemctl enable usb-camera-rtsp
sudo systemctl start usb-camera-rtsp
sudo systemctl status usb-camera-rtsp
Check the stream using VLC or a similar RTSP viewer:
rtsp://<pi-zero-address>:8554/unicast
You should see your camera feed.
On the Hub (Pi 5 with Homebridge)
Prerequisites
- A Raspberry Pi 5 running the latest Raspberry Pi OS.
- Homebridge will be installed to integrate with HomeKit.
- Ensure both Pi devices are on the same network.
sudo apt install ffmpeg
curl -sSfL https://repo.homebridge.io/KEY.gpg | sudo gpg --dearmor | sudo tee /usr/share/keyrings/homebridge.gpg > /dev/null
echo "deb [signed-by=/usr/share/keyrings/homebridge.gpg] https://repo.homebridge.io stable main" | sudo tee /etc/apt/sources.list.d/homebridge.list > /dev/null
sudo apt update
sudo apt install homebridge
After installation, Homebridge typically starts as a service. Access the Homebridge UI via http://your-pi5-ip:8581
Install the Homebridge Camera FFmpeg Plugin
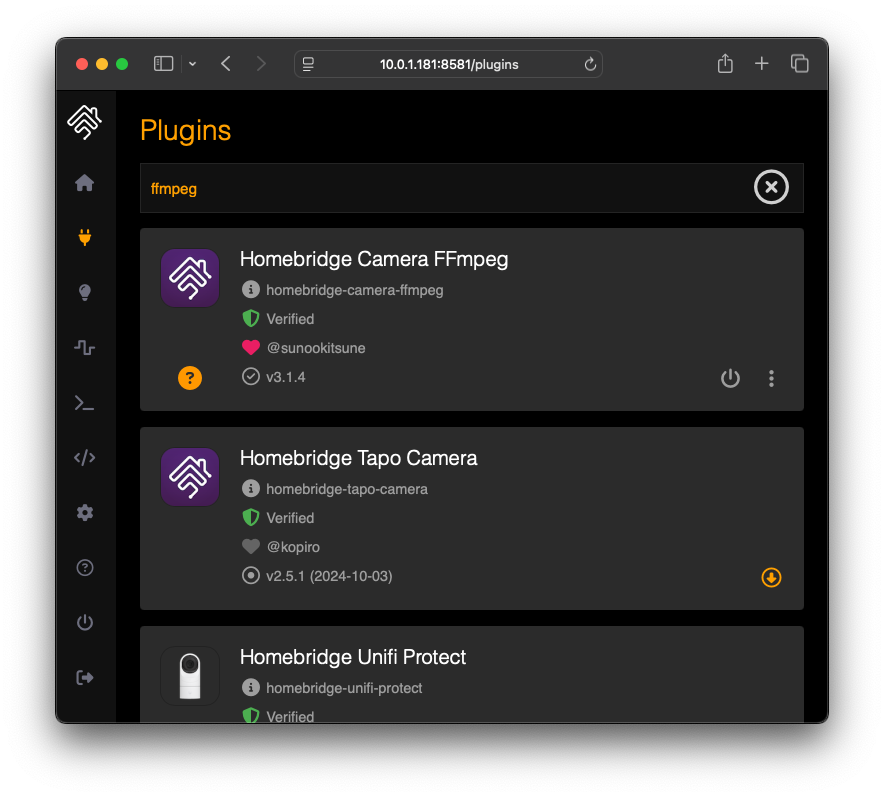
In the Homebridge UI: 1. Go to the Plugins tab 2. Search for homebridge-camera-ffmpeg 3. Install it

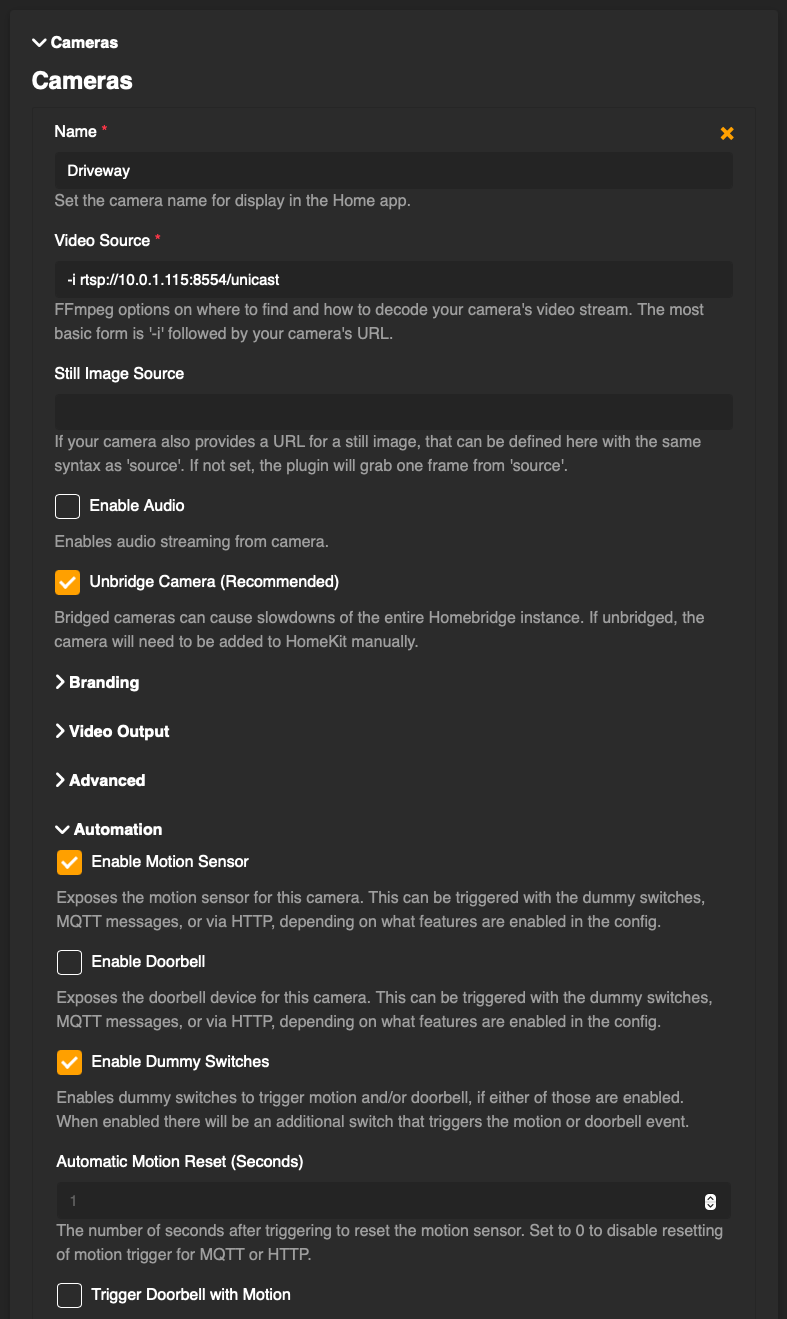
Once installed, open the Homebridge UI, go to the plugin configuration, and add a camera entry. For example:

If you want to use motion events, configure the http server as well:

Save and restart Homebridge. The camera should appear in the Home app on your iOS device once you’ve added Homebridge as a bridge to HomeKit.
Install Motion (Optional)
motion can be used to detect motion events to trigger other automations, or to record motion events to disk. If you need motion detection, install and configure it:
sudo apt install motion
sudo cp /etc/motion/motion.conf /etc/motion/motion.conf.bak
sudo vim /etc/motion/motion.conf
In the motion config file make sure these are set:
netcam_url rtsp://<pi-zero-ip>:8554/unicast
mmalcam_name Driveway
on_event_start /usr/bin/curl "http://localhost:8082/motion?Driveway"
The on_event_start
could be any script. When we call that URL via curl, homebridge sends homekit a notification to activate the motion event.
sudo systemctl enable motion
sudo systemctl start motion
To add the camera to your home in homekit, choose add accessory from the top, and tap on "More options...". The camera should appear there. The pairing code is typically the same code as used by homebridge. Check the homebridge logs on the main page for homebridge.